Mounting rubber stamp dies
| Photos below are larger than the actual stamp dies. The black-and-white images show the stamps at actual size. | |
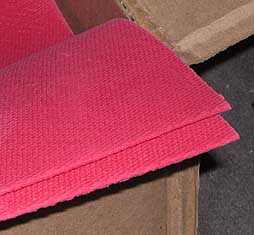
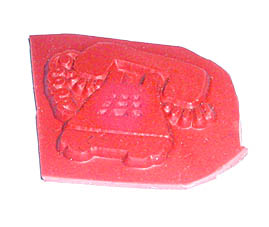 Untrimmed stamp die Typical of dollar-a-die dies and grab bag dies catalog number 2546 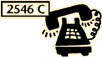
|
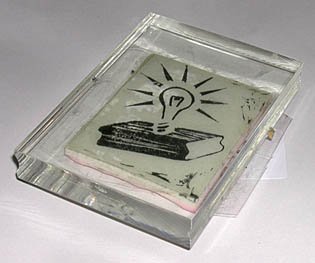
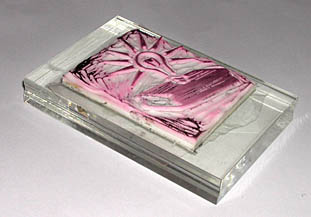
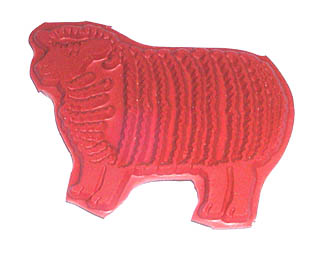 Trimmed stamp die This is what you get for half the price of a finished stamp catalog number 4080 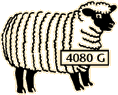
|
When not to mount stamps
If you plan on using stamps to decorate clay, either ceramic or polymer clay, you may prefer to leave stamp dies unmounted. That allows them to conform better to curved surfaces than a mounted stamp can.
Overview of mounting
The instructions below are for stampers who want the best results from their stamps. Really, you can get an image from an unmounted, untrimmed die just by inking it and pushing it down with your fingers. A mount helps get even pressure. Trimming eliminates stray marks outside the image. Cushion helps make up for uneven surfaces.
Cheap stamp sets are often untrimmed and uncushioned, and they still work. You’ll get reasonable results even if you don’t follow these directions to the letter. As you become a more experienced stamper, you’ll come to appreciate the value of good trimming.
Mounting rubber stamp dies - the old way - permanantly on wood
1. With a good pair of scissors (Fiskars embroidery scissors are perfect) trim the die as close to the outside of the design as you can. Follow the contours of the image, or you will get stray lines from inked edges of the trimmed die when you stamp. Try not to undercut the design.
2. Stick the die to a piece of sponge rubber cushion with rubber cement.
Some of our stash of cushion. We buy it in 36 x 44 inch sheets.
3. Trim the cushion. You don’t have to follow the contours of the design so closely as when trimming the die, but excess cushion can cause stray marks, too.
4. Select a mount. Scrap wood works fine, or be imaginative -- use something that follows the theme of the stamp. All you need is a firm flat surface you can glue to.
5. Index the mount. Ink the die on a good black stamp pad, place it ink side up on your work surface, and press the mount down on it. Be sure that the ink will adhere to the mount. Unless you can find special solvent-based ink for hard surfaces, use unfinished wood mounts. To get the image positioned accurately on the mount, put the mount down on a piece of paper and trace its outline with a pencil; position the inked die in the right place within the outline; and use the outline to guide you as you press the mount down on the die.
6. Stick the cushioned die to the mount with rubber cement.
7. Stamp merrily away with your newly mounted stamp.
Mounting on hook-and-loop fasteners
The trouble with wooden mounts is that they take up lots of space. If your stamp collection grows beyond a few hundred stamps into the thousands, you will start to wonder where to put them all. Two popular solutions are mounting stamps on vinyl cling film and on hook-and-loop fasteners (stuff like Velcro).
The quickest way to mount dies is with the hook-and-loop system. For the mounts it uses acrylic
blocks with the hook fasteners inset into the blocks. Stamps are backed with loop
fastener cut from an adhesive backed sheet.
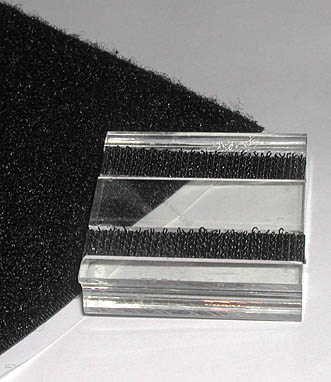
A sheet of loop fastener material and a mounting block
The hook and loop system used to be available from HALOS Rubber Stamps (Hooked and Looped on Stamps). They no longer have a web site as of August 2015, and we're not sure where you an get that system; check ads in stamping magazines.
1. Trim the die as for mounting on wood.
2. Put the back of the die against the release paper side of the sheet of loop fastener. Draw the outline of the trimmed die on the release paper and cut the loop fastener on that line. Peel off the release paper and adhere the loop backing to the stamp die. The loop fastener will cushion the stamp as well as adhere it to the acrylic block.
3. When you want to use that stamp, slap it on the acrylic mount. When you’re done, store the stamp without the mount!
The disadvantage of the hook-and-loop system is that the stamp isn’t indexed. It can be harder to position the stamp accurately than with an indexed stamp. The loop fastener material is more expensive than rubber cushion, but you don’t need a wood mount for each stamp. Newer versions of the HALOS system use clear loop sheets to allow indexing the stamp.
Mounting on vinyl cling film
A system that’s similar to the hook-and-loop system uses clear vinyl film to adhere stamps to a smooth acrylic block. I’ve used this system and like it for mounting stamps carved on erasers or other soft carving material. Unfortunately, I don’t know where you can get the clear mounting film.
 |
 |
 |
|
1. Trim the die as for mounting on wood.
2. Stamp the image onto paper. Mark the outline of the trimmed die on the paper and cut on that outline.
3. Mount the paper to the stamp die with clear double-sticky tape, with the stamped image up and the raised part of the stamp die down.
4. Adhere cling film, cut a little bigger than the stamp, to the paper with clear double-sticky tape.
5. The clean cling film will adhere to a clean acrylic mount. When you’re finished stamping, remove the stamp from the mount and store it.
The advantage of this system is that the stamp is clearly indexed. It’s pretty easy to stamp just where you want. A disadvantage is that there are more steps than in the hook-and-loop system. If the tape or cling film expands or contracts more than the stamp die as temperature or humidty conditions vary, the assembly won’t be flat and won’t cling as well as you’d like.
We found static cling film available on the Rubberstampmaterials.com web site
-- Dean for Zum Gali Gali